From Builder Basic to Custom Closet (for under $500)
One of the first big projects I did when I moved in was making my master closet work for me. It was a total builder basic with no storage. I quoted out custom, but they all came in around $2000! For less than $500 I was able to design and build a closet that worked for me and was exactly the way I wanted (and it was actually a pretty easy project to do).
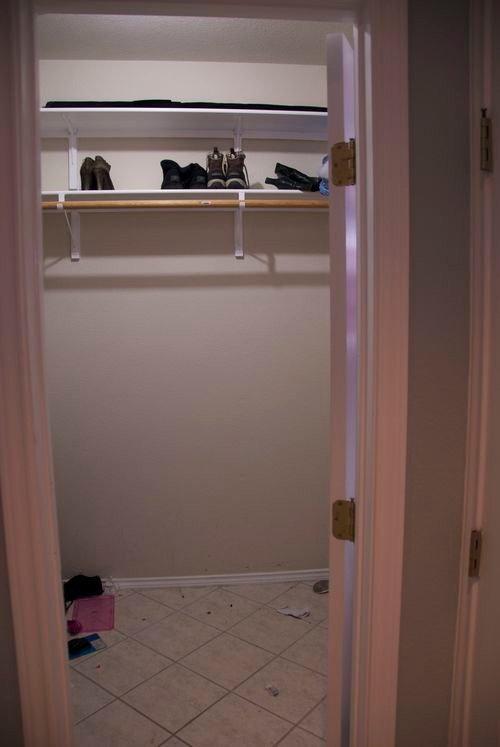
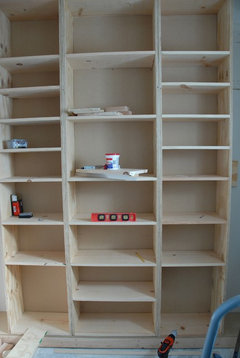
The view from the door before.
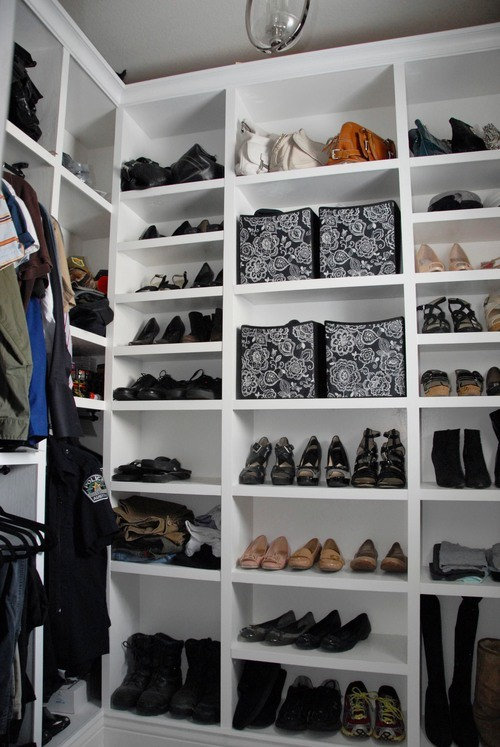
The hubs side after.
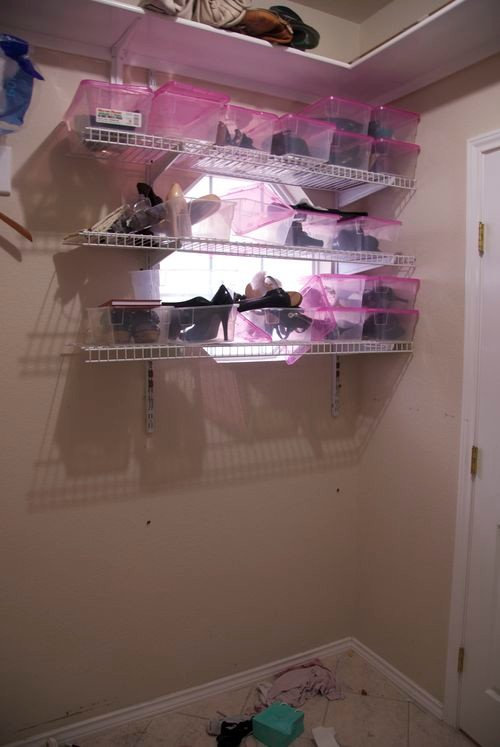
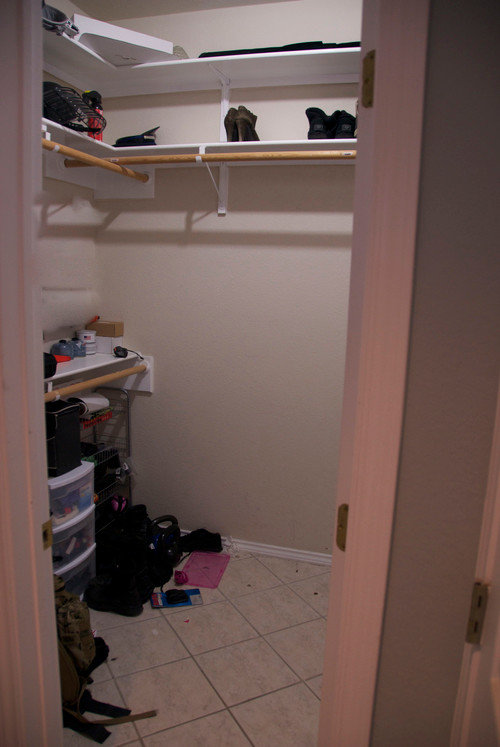
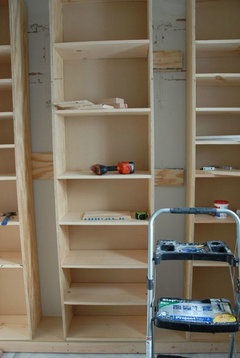
My side before.
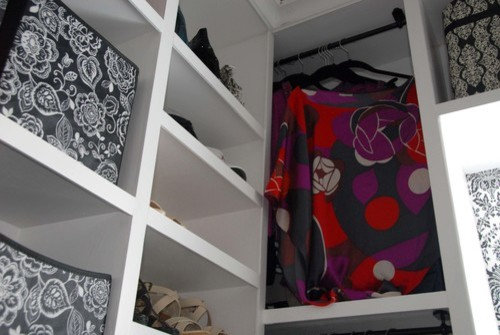
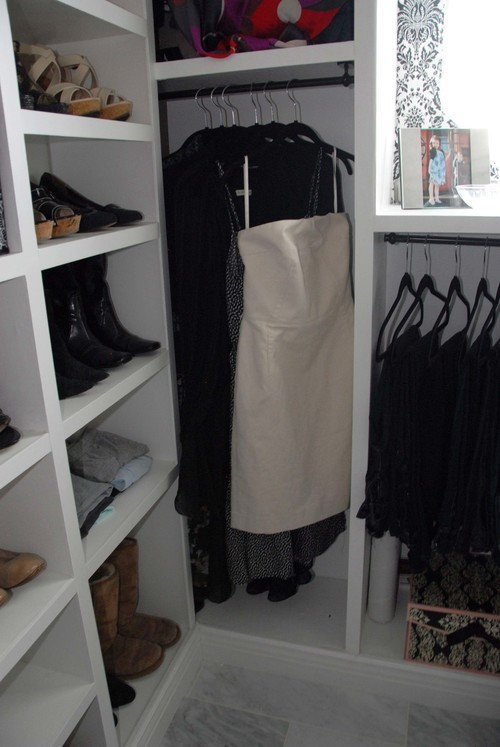
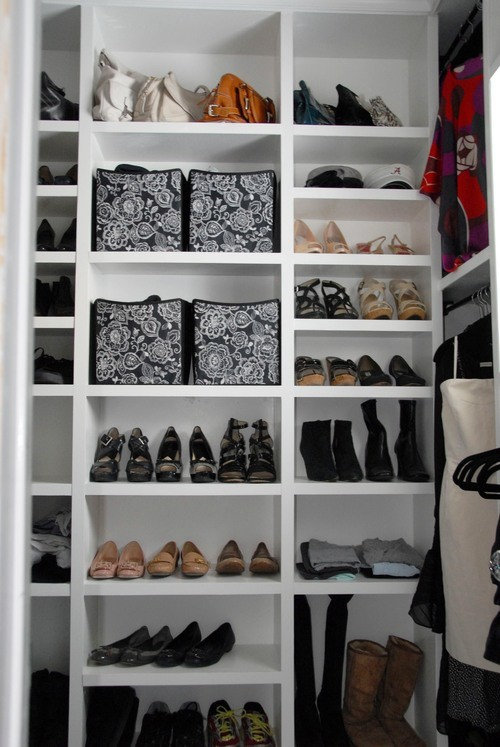
My side after.
The materials I used were 3/4 inch plywood. That's pretty much it. I figured out the measurements beforehand and took them to Home Depot, where they cut the wood to size for me. After that, all I had to do was nail and screw it together. Easy peasy.
Kommentarer (37)
 9 år sedan
Will you come do mine? :)
Great job! What did you use for shelving? Are you handy? How long did it take? Love the doorknob...you deserve it for saving some serious dough. :)
The Rozy Home
Författare9 år sedanI just added the materials for you! :-)
The shelving is plywood trimmed out with lattice. And as far as handy, yes, I am BUT not so much when I did this. This was my first big woodworking project. It really was easy. I wish I had taken pics along the way. I'm planning on doing something similar in my daughter's room and will be sure to take photos for that one. :-)
 9 år sedan
I want to do something really similar. Can you give us the details, please? Thanks! By the way---Great Job!
The Rozy Home
Författare9 år sedanI would love to try to explain it to you, but it probably wouldn't make much sense (but let me try). It's a basic bookcase type system where you create the shell and then attach the shelves with your choice of nail or screws (I did both because I wasn't familiar with pocket screws back then. Now, I would use pocket screws). The base was made of 2 x 4's with a 3/4 inch piece of plywood attached to it. I did this because I wanted to carry the same baseboards from my bathroom into the closet. After I constructed the shell with the shelves in, I set it on top of the base and attached it to both the base and the wall using screws. I built each section individually and then used lattice to cover where the the two shells came together. I found a couple of pics on the blog. It might help it make more sense. :-)
- 9 år sedan
Okay..Those pictures helped a lot!! And Home Depot cut them to size for you?? That is awesome. I am going to try to draw something up for my closet. I have a general idea of a layout, I just have to figure out measurements. Thanks again.
The Rozy Home
Författare9 år sedanYes ma'am. As long as it is a straight cut they do it. I think the first 6 or so are free and then it's something crazy like .25 for each cut after. Totally worth it. If you need anything else, feel free to shoot me a message. Always happy to help! :-)
 9 år sedanHow large is your closet? I'm having trouble finding any closet organizers that will "fit" my closet since it seems to be a size that isn't "standard". Also, I must have more hanging clothes than the normal woman! I noticed your closet has quite a few shelves- many more than I think I need. I need more hanging space. How would you modify your closet design to fit that problem? Thanks!
The Rozy Home
Författare9 år sedanHi there! It is roughly 9 ft x 7 ft but it has some odd angles. As far as clothes, the day I took that, most of them were at the dry cleaners. You'd be surprised at how much I stuff in there. :-) I also put summer clothes away during the winter and vice versa. I like to walk into my closet and know that what I'm looking at is something I can wear now. I'm kind of weird that way. As far as modifications, instead of doing three vertical sections on the back wall, you could do two horizontal sections to give you more space to hang up clothes. Of course, you probably also don't have a huge window in your closet. If not for that, that would be another section for hanging clothes. I will work on drawing some plans up in sketch-up if you will shoot me over your dimensions. :-)
 9 år sedanI love it!!! Wow really good!! Yeah our custom closet would cost around 5,000... I might have hubby make this for us!! Thanks for the pics
- 9 år sedan
I really like the idea and would love to do it in my closet. Thanks for offering to modify your dimensions! My "master closet" if you can call it that (we have two of the same dimensions) are rather small for masters. And on top of that they are oddly shaped. They are only 72" deep and 70.5" wide with the door only 26" from the left hand side. (We have 36" doors.) The good news is that our ceilings are 9 feet, which would allow us to go "up" for storage. Other than that we are pretty stuck as far as having enough space for both hanging clothing and drawers. You see the problem. Anything you can do to suggest a solution will be a real help! Thanks.
0 The Rozy Home
Författare9 år sedanPritchkd - Let me play with it this weekend and see what I can come up with.
Dacolling - Lattice is a piece of trim you can get at HD or Lowe's. :-)0 9 år sedanÄndrades senast: 9 år sedan
Any chance of getting a pic of the window "after"?
0The Rozy Home
Författare9 år sedanÄndrades senast: 9 år sedanHi Lucy- This is the only pic I seem to have:
 PROThe Rozy Home thanked Catalyst Development Group LLC.
- 9 år sedanThat's awesome. I need to make changes to my master closet without breaking the bank. Need to start measuring.The Rozy Home thanked dperdue
- 9 år sedan
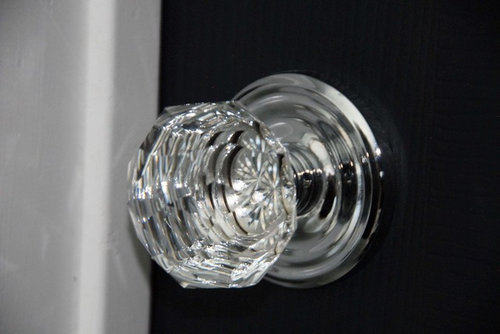
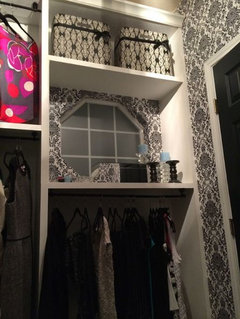
OMG I LOVE THE WINDOW!!!! Ooopps did I type that out loud....I am head over heels for your re-use of that window! Kinda matches the girly doorknob...
0  9 år sedan
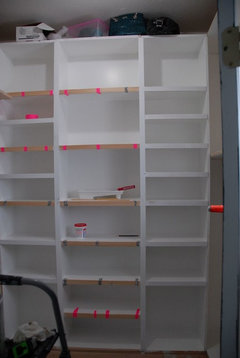
Beautiful! What is the purpose of the small pieces of tape in the third photo above (the one where you're painting the shelves).
0 PROThe Rozy Home thanked OTM Designs & Remodeling Inc.
 9 år sedan
When I first bought my new apartment, first thing I did (after putting in the central a/c and heating) was to commission local company to build 4 closets--even one in our basement storage room plus one in a small walk-in. They use German Raumplus materials and it has made all the difference. Each closet is the main feature of each room and they all afford me a measure of organization and storage I never had before. All the closets pictured here are wonderful.
- 9 år sedan
that is absolutely amazing!!! I still don't understand how you did it (have never done woodworking before) but may take the pic into home depot with our dimensions and see if they can explain/help. BEAUTIFUL!!!!!!
The Rozy Home thanked Susan  9 år sedan
Really, really great job-and goes to show you can get a great look for not a lot of money. I am very handy, so might consider doing something like to the house we selling right now. The master ensuite closet needs some work because it's really weird. GREAT job!
The Rozy Home thanked Alyssa B PROThe Rozy Home thanked Setting the Stage, Home Staging and ReDesign
The Rozy Home
Författare9 år sedanThank you all!
Lucy - We thought about covering it, but I needed a space for jewelry and such, so I left it as is.
kshavu - I glued the strips on because I'm very OCD and wanted to make sure I could make adjustments to the way the pieces lined up.Susan - It is basically just bookshelves made to fit the space.
The number one comment I saw on FB was that this was a shoe closet. It was really, really hard to photograph this space because of the wall on the side, but we actually have more hanging space now than we did when we started. The sections on the side (next to the shoe compartment) go back about 2 feet. On my husband's side, he has two sections on the bottom and one on the top. On my side, I have the same thing except I made my hanging compartments on the deep side so the stuff I don't wear that often can be pushed back and out of site. We have a total of 190 inches (length) of hanging space. Initially we had 180 inches (length) so we gained almost a foot of hanging space. :-) PRO9 år sedan
The Rosy Home - your accomplishment is so very impressive! It makes me want to tackle a few closets in my home. Thanks for sharing the before and after pictures and ALL the details throughout this post. Well Done! Enjoy ;)!
The Rozy Home thanked Seating Innovations 9 år sedanOh how I long for my own Walk-in closet. I live in a post 2nd WW built. Our houses in London aren't that spacious. I'll have to wait for when the kids are grown and leave home to get that walk-in.0
 8 år sedanBeyond jealous...this is the best before and after I have ever seen...standing ovation. It looks better than the custom closets for thousands.0
- 8 år sedanThis looks terrific! What gumption you have. I appreciate your detailed explanations and pics. Thank you so much!!!! I'm giving considerable thought to doing it myself but there are a few details I'm not sure how to do:
Would you explain how you connected your corner units, how you attached the units to the walls and how you connected them to the raised 2x4 base, how do you attach the base to the floor or don't you attach it? (I know you said you screwed them, but how many screws did you use so that it was securely fastened and you weren't worried about them falling over) and how did you paint it? It seems like painting it would be quite difficult if all the shelves were pre-attached. Did you spray them or roll them?
Years ago I got a quote for a custom unit for $4k and was shocked....and it was MDF. I'd love to do something like this!!
Thanks so much for sharing!!!!0 - 8 år sedanI am so jealous. It is fantastic. I also would love for you to come and do mine every bedroom in my home has a walk in closet and the master has two. They all need to be updated from the wire builder grade special. Just trying to figure a budget. This has given me huge inspiration. Thanks for sharing.0
- 8 år sedan
Rozy Home, as everyone else has said, thank you so much. You have made this sound so simple and cost effective. We visited the new Container Store in our community yesterday and my wife was excited about having a custom made closet built for one of our bedrooms. It's a room that we will someday redesign, along with the entire upstairs to make a complete master suite/total spa type environment. It will be very nice then. But, as you know, those things take considerable time and money.
So, in the meantime, I am considering doing the job myself. It looked like simple construction in the store and for a lot less money. And after reading how you got it done, I'm even more convinced that I should at least try to do it myself. What could I possibly lose, except time, working on it myself?
Again, thanks for the encouragement and the know-how! I hope it comes out half as well as yours!
Eric
0
Reload the page to not see this specific ad anymore


Jill J. Wallace, Color Redesign